Masonry Restoration: Brick, Stone, and Material Substitution
Words: Megan Rajner
Words: Megan Rajner
Photos: John Speweik
Brick
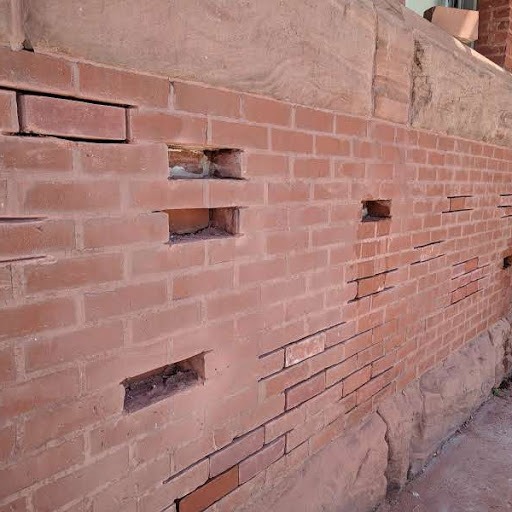
When working with brick on a restoration project, harvesting existing bricks is the crucial first step. This is exceptionally important when approaching a historical restoration, as it ensures the reclaimed materials can possibly have future use in new construction.
For buildings that were constructed from sand mold bricks made in the late 19th and early 20th centuries, harvesting can also require checking the backside of a deteriorated brick to see if it was made double-faced. If this is the case, these particular bricks can be flipped around when used for a new project, in order to look cleaner and less deteriorated. Considering the typical four-inch brick will still mostly be intact even with a little decay, salvaging is done by simply laying the deteriorated side where it will not be seen in the wall assembly.
New bricks manufactured today are extruded through a pug mill, and in this extrusion process, only three sides of the brick are faced- and therefore unusable for flipping around after a long period of deterioration.
If some of the harvested bricks have deteriorated beyond half the width of the brick, then it is typical practice to repair, rather than harvest, undamaged brick for reuse. Of course, the challenge of matching historic brick is just that: since the bricks are no longer made, you have to establish a good brick match in order to replace the brick needed. This is a good way to potentially minimize the need for replacement bricks.
Another type of brick repair is for cracked brick faces. Typically, these are small cracks- anywhere from hairline to about one-sixteenth of an inch in width. If you want to repair a crack like this, it should be done with DHL injection. Dispersed hydrated lime (DHL) injection requires the use of a syringe with a needle to inject the very viscous substance into the brick’s crack, which is drawn through the clay through capillary action. This process was developed in Germany and has been successfully used in the United States for about the last 15 years. With this repair process, a lime-based material is injected into the crack, allowing it to absorb into the system of the clay. After it sets, a surface treatment is put over the top that’s actually color-matched to the face of the existing brick. This method will prevent water infiltration from occurring in the future, and a repair like this can last up to over 50 years. After that length of time, the repair may need to be repeated, because it does wear depending on weathering directions and other factors.

If a brick cannot be harvested or repaired for reuse, the next option would be to replace it. Since the modern brick production process has changed drastically since the 1800s, it can be difficult to recreate the exact perfect match to coexist with existing bricks. Typically, the size and texture of an existing brick are matched before color. This can be the most difficult stage of brick matching, especially since the color can change over time due to atmospheric conditions. The next part of the brick renovation process can optionally include staining or color matching. Companies like Nawkaw provide staining processes and materials and have a team of experts traveling nationwide to provide these types of services.
The final part of the process is applying the ASTM test method to the brick. ASTM C67 addresses a number of structural tests including modulus of rupture, compressive strength, absorption, saturation coefficient, the effect of freezing and thawing, efflorescence, the initial rate of absorption, and determination of weight, size, warpage, length change, and void area. Tests for saturation, compressive strength, and IRA are excellent for understanding what kind of brick you have and can be run on existing bricks before making replacements. New replacement bricks can have tests run on them as well, to ensure sure they match the physical characteristics and qualities of the existing ones.
Stone
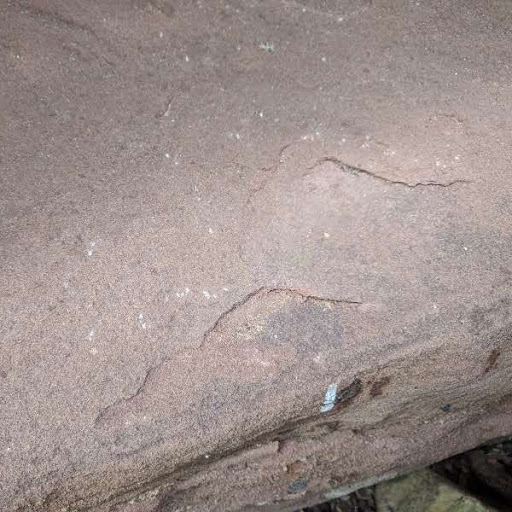
The harvesting of existing stone is quite similar to the process of harvesting brick. However, stone veneer work and load-bearing masonry construction typically require much larger units, both in weight and dimension and as a result walls are many times thicker than a typical wall. In historic buildings, the foundation stonework very often can be up to several feet thick, and the veneer, or the course can be anywhere from eight to twelve inches in thickness (as far as the units go). The face of the stone will frequently become more deteriorated on the first or second course in colder climates where sidewalks are covered with salt in the winter to melt the ice and snow. That salt is often whipped up into the stone and it deteriorates the stone rapidly, so typically the structural integrity of the stone is still intact and can be refaced. As a repair, turning the stone around and replacing it back in the wall in the same location is common, and has been a successful approach used in restoration for many years in the United States.
The DHL injection method can also be used on stone for restoration, but when the unit has been damaged beyond repair, it must be replaced in a method similar to brick masonry. Typically, either the architect or a preservation specialist on the project will contact manufacturers to request samples of their materials for new masonry products. Those samples will be sent to the project site to be compared to the existing units, and determination made on which will be the best match. As far as stone goes, it is the best practice to contact the local quarries, or those in the area of the construction site, to see if they are still in operation. Unfortunately, because many historic buildings are constructed from such old materials, the quarries may be closed, and the stone would then have to be sourced from a location farther away. In the United States, buildings from the 1800s and early 1900s were built with many of the same masonry materials, and for stone, this includes mainly limestone, granite, sandstone, and marble.

A technique that is very effective in stone restoration is known as stone redressing, which is useful because the stone doesn’t have to be completely removed from the wall to be reset. While this technique should only be utilized if the deterioration is half an inch to three-quarters of an inch on the surface, it is great for chiseling away a stone at its edges for restoration. You can typically take a hammer, pneumatic chisel, pneumatic hammer, or other carving tools to remove all the loose flakes and deterioration on the surface of the stone itself. It is important to remind users of this method that it is limited to the half-inch or three-quarters-inch dimension. Beyond that, the mortar joist surrounding each stone unit could be affected, which could require a more intense kind of repair. This is usually called out in some specification for each project as what is known as the Dutchman treatment.
Dutchman treatment is the most difficult kind of stone repair and requires a very high degree of masonry skills. It is important to have the original stone source available in order to complete this kind of repair effectively. In this method, which is essentially a partial stone replacement, the deteriorated portion of the stone is removed and replaced with a new kind of stone, which is dovetailed or anchored right into the unit itself, using very small paper-thin joints within both the repair the face of the stone. It’s a very precisely fit piece, typically square or rectangular in shape, and a lot of times is located at the corners of a unit or at the edges. Dutchmen repairs are rarely (if ever) performed in the center of the stone, simply because this is typically the most durable part of the unit.
Additionally, a partial stone replacement is a direct cousin to the stone Dutchman. Take a unit, say for instance that might be two-foot-long by a foot high by eight inches wide, and say half of the stone unit has deteriorated. In this case, literally, half the deteriorated stone is removed from the wall and then replaced with another piece of stone of the same dimension to make up the entire two-foot unit size again. This is compared to a full stone replacement, which is simply what it says. This is when a stone is replaced in its entire dimension, depth, height, and width. It is replaced from the head joint to the head joint, bed joint to bed joint, and making sure that the faces finish the same way as the original that surrounds it.
During a full stone replacement, you have to be mindful of shoring, and verify that the wall is not put in jeopardy of collapse or something of that nature. If you’re taking out several pieces of stone, you have to be systematic in doing so. You have to do what’s called “leapfrogging” down the wall, where you take one piece of stone out at a time. If an entire course needs to be replaced, obviously you cannot take out the whole course of stone and replace it at the same time. Replacement must be alternated until each unit is repaired, before returning to address the units that were skipped.
Substitute Stone Repair Mortar
Over the last 25 years in the United States, there has been a growing market for material alternatives, including substitute repair mortar in masonry construction. These materials are not stone but are made out of mortar with the intention to look just like a stone for the visual effect. However, the catch is that the quality of the mortar does not compare to the quality of using an actual stone. All other masonry restoration methods, the harvesting, the redressing, the injection, the Dutchman, and the stone replacement, are all the highest quality stone repair approaches, and will most likely never be outdone by substitute stone.
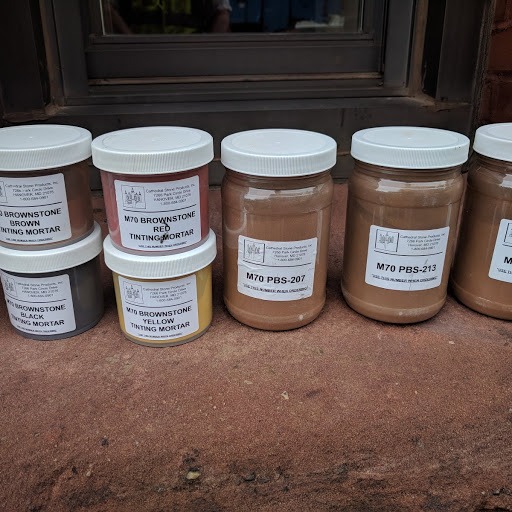
Using substitute stone repair mortar is a process by which many of the companies that sell the material require their applicators to be trained, and you have to go to training classes at their company headquarters in order to be certified to install the products. There’s a specific methodology and application to using this material on buildings, and each individual company has its own set of criteria in order to effectively and successfully use its product. There are special formulas for each type of stone repair, and they are sold according to the stone types, which are the typical limestone, granite, or marble, but also terracotta.

When the original stone cannot be matched at any quarry, and can only be repaired seamlessly by making a manufactured replica, manufactured stone lookalikes can be one of the best solutions. Many masonry specialists and consultants use alternative materials, and the aforementioned method as a very last option if their clients cannot afford to do any other types of repairs. It can be worrisome to rely on the material to be properly installed and applied to the surface of the wall so that it doesn’t detach in the future, as compared to the other treatments of stone repair where you’re actually harvesting stone, putting it back in, redressing the surface of the wall and there is no attachment of any new materials on the face of the wall. You’re back to the original stone again, and you’re focusing more on the original stone than you are introducing another product.